Reader-supported: if you buy through links on this page, we may earn a commission at no extra cost to you. We don't run a testing lab; every rating quoted here comes from verified Amazon buyers. As an Amazon Associate, we earn from qualifying purchases.
Installing a bidet seat is the rare home upgrade where the marketing undersells the reality. Manufacturers say "30 minutes", and for a seat like the Kohler PureWash E580 — our current top overall pick — that is an honest number rather than a marketing one. Plenty of people beat it. The entire job is: turn a valve, unscrew two bolts, add one fitting to a water line, bolt on a bracket, click the seat in place, and check for drips.
There is no cutting, no soldering, no pipe-wrenching, and — for the standard US toilet — no plumbing knowledge required. Every connection is hand-threaded, the same kind you'd use hooking up a garden hose. If you have ever replaced a regular toilet seat, you have already done the hardest 40% of this project.
This guide walks the whole thing step by step for both types of unit: electric seats (warm water, heated seat, needs an outlet) and non-electric seats and attachments (cold water, no outlet, even simpler). If you haven't picked one yet, start with our electric vs non-electric comparison, then come back here for the wrench work.
Before anything else: confirm your bowl shape
The most common installation "failure" isn't a leak — it's ordering the wrong seat. US toilets come in two bowl shapes: round (about 16.5″ from the seat bolt holes to the front rim) and elongated (about 18.5″). A bidet seat sized for the wrong shape will either overhang the bowl or leave an awkward gap, and no amount of wrench technique fixes it.
Grab a tape measure before you order: measure from the center point between the two seat-bolt holes straight to the front edge of the bowl. Around 16.5″ means round; around 18.5″ means elongated. Most toilets sold in the last two decades are elongated, but "most" is not "yours." Our round vs elongated fit guide covers the edge cases — skirted bowls, one-piece toilets with curved tanks, and French-curve designs where the tank crowds the seat mounting area.
What's in the box
Bidet seats ship with everything the standard install needs. Opening the box, you should find:
- The seat itself (or, for attachments, the spray unit that sits under your existing seat).
- A mounting bracket — a flat plate that bolts to the toilet's existing seat holes; the seat slides onto it and clicks.
- A T-valve (also called a T-adapter) — the one genuinely new part. It splits your toilet's cold-water supply so the tank and the bidet both get fed. Standard US thread is 7/8″, which matches nearly every toilet fill valve made for the American market.
- A braided or PVC hose to run water from the T-valve to the seat.
- Bolts, nuts, rubber washers, and adjustment plates for the bracket.
- Electric models only: a power cord, typically hard-wired to the seat, around 3.5–4 feet long.
Lay everything out before you start and check the rubber washers are actually seated inside the T-valve and hose nuts — they sometimes ship loose in the bag, and a missing washer is the number-one cause of the mystery drip you'll otherwise chase for an hour.
Tools you'll need (probably none)
Most installs require no tools at all. Every water connection is designed to be hand-tightened, and seat bolts usually take a wing nut or a plastic knob. That said, have these within reach:
- An adjustable wrench — for stubborn old seat bolts and for a final gentle snug on metal fittings. Not for plastic ones; more on that below.
- A flathead screwdriver — some older seat bolts have a slotted head on top.
- A towel and a small bucket or bowl — a cup or two of water will exit the supply line when you disconnect it. This is normal, not a leak.
- A flashlight — the connection at the bottom of the tank lives in a dark, awkward spot.
Notice what's not on the list: Teflon tape. The connections on a bidet install seal with rubber washers, not thread tape. Wrapping tape on a washer-sealed compression fitting can actually prevent the washer from seating and cause the leak you were trying to avoid. Skip it unless your instructions specifically call for it on a metal-to-metal joint.
The install, step by step
The steps below cover a standard electric or non-electric bidet seat. Attachment-style units (like the LUXE NEO 185 below) skip steps 4 and 5 entirely — the unit clamps under your existing seat instead.
Shut off the water and empty the tank
Find the shut-off valve — the oval or football-shaped knob on the wall or floor behind the toilet, low and to the left on most US bathrooms. Turn it clockwise until it stops. Then flush the toilet and hold the handle down to drain as much of the tank as possible. This depressurizes the line so the next steps don't greet you with a spray.
If the valve hasn't been turned in a decade it may be stiff. Firm, steady pressure — not a wrench — is the move. If it won't budge or weeps from the stem when turned, stop and read the "when you actually need a plumber" section below; this valve is the one part of the job that occasionally does.
Remove your old toilet seat
Pop open the two small caps at the back of the seat (if present) to expose the bolts. Hold the bolt head on top with a screwdriver or your fingers and spin off the nut underneath — it's usually a plastic wing nut you can turn by hand. Lift the old seat off and set it aside; don't throw it out until the new seat is installed and leak-checked, so you always have a working bathroom overnight if something's missing from the box.
While the bowl is bare, give the mounting area a wipe. You will never have easier access to that grime again.
Install the T-valve on the supply line
This is the heart of the job. Put your towel down, then unscrew the supply hose from the bottom of the toilet tank — that's the fill-valve inlet, the 7/8″ plastic connection under the left side of the tank. A little water will drain out; that's the tank line emptying, not a problem.
Thread the T-valve onto the fill-valve inlet where the hose just was, then reconnect the original supply hose to the bottom leg of the T. The third port — the one facing out — is where your bidet hose will connect. Every connection here is hand-tight only. Start each thread slowly and backwards a quarter-turn first until you feel it drop into the groove, then tighten forward; that little ritual is what prevents cross-threading on soft plastic.
Bolt on the mounting bracket
Set the bracket over the two seat-bolt holes, drop the bolts through (with their rubber washers between metal and porcelain), and thread the nuts on underneath. Before you tighten fully, slide the seat on loosely to check alignment — most brackets have slotted adjustment channels so you can shift the seat forward or back until it's centered over the bowl with the lid closing cleanly against the tank.
Once it's positioned, remove the seat, tighten the bracket nuts snugly (hand-tight plus a small final turn), and you're done with the only "structural" part of the install. Some skirted or one-piece toilets need the included top-mount hardware instead — the bolts anchor from above rather than being nutted from below. The manual covers which set to use.
Slide the seat onto the bracket
The satisfying part. Line the seat up with the bracket rails and push it back toward the tank until it clicks. Give it a wiggle — it should feel locked, not loose. Nearly every seat also has a release button or latch so you can slide it off for cleaning later; find it now while you remember where it is.
Connect the bidet hose
Run the included hose from the open port on the T-valve to the inlet on the side of the seat. Both ends are hand-tight compression fittings with rubber washers — same rules as step 3: reverse quarter-turn to seat the thread, then tighten by hand until snug. If a fitting is metal-on-metal and still seeps later, an adjustable wrench turned an extra quarter-turn at most is the ceiling. Plastic nuts never see the wrench.
Electric seats: plug into a GFCI outlet
Electric bidet seats are appliances sitting next to water, and they're built for a GFCI outlet — the kind with the "test" and "reset" buttons, required by US electrical code (NEC) for bathroom receptacles. Plug the cord directly into the wall. Manufacturers uniformly say no extension cords, and it's advice worth taking: cords are typically only about 3.5–4 feet, so the outlet needs to be genuinely near the toilet.
No outlet within reach? You have two honest options: pay an electrician a few hundred dollars once to add a GFCI receptacle, or go non-electric — see the section below, and our full electric vs non-electric breakdown for what you give up (mainly warm water and the heated seat).
Turn the water on slowly and check for leaks
Open the shut-off valve gradually — a quarter of the way first, while you watch the T-valve and both hose ends with your flashlight. No drips after thirty seconds? Open it fully. Let the tank refill, flush once, and check every joint again while the line is under full flushing pressure, because some seeps only appear then.
Then run a dry towel around each connection and look for damp spots — your fingers will miss a slow weep that a towel catches instantly. Do one final towel-check an hour later. Bone dry twice? The install is done. Fire the seat up and adjust the pressure down before the first use; every manufacturer ships the default higher than first-timers expect.
Non-electric is even easier
Everything above applies to non-electric seats too — just skip step 7. There's no cord, no outlet question, and nothing to program. A non-electric unit taps the same cold line through the same T-valve and controls pressure with a mechanical dial. That's the appeal: the VOVO Nature 7 — our favorite non-electric full seat — installs identically to an electric model minus the plug, and with no cord to route there is genuinely one less thing to get wrong.
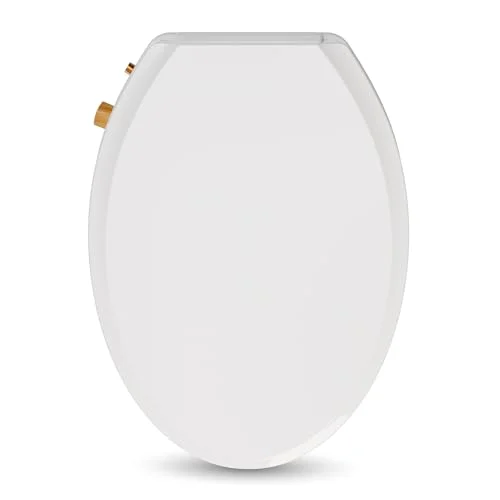
Attachment-style bidets are simpler still. Instead of replacing your seat, the unit slides under it: you remove the seat bolts, lay the attachment's thin control plate across the back of the bowl, and re-bolt your existing seat right through it. T-valve and hose are the same as steps 3 and 6. Total time is genuinely 15–20 minutes, which is a big part of the appeal of the LUXE NEO 185 attachment — at $49.99, it's the cheapest and simplest possible way to find out whether a bidet is for you. (If budget is the deciding factor, our under-$100 picks compare it against the Nature 7 and others.)
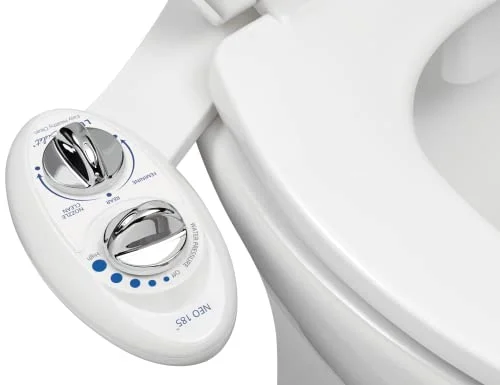
The trade-off for all that simplicity is cold water only (and no heated seat). Whether that matters depends a lot on your climate and your tolerance; our warm-water guide digs into why so many owners who start with a $30 attachment end up upgrading to an electric seat within the year.
Electric seats: what actually changes
Mechanically, the water side of an electric install is identical to non-electric — same T-valve, same hose, same cold line. Electric seats heat their own water internally, so you never touch a hot-water line. The differences that matter:
- The outlet requirement. GFCI, within about 3.5 feet, no extension cords. This is the single factor that decides the purchase for most bathrooms — check it before you order, not after.
- Weight and bulk. An electric seat like the PureWash E580 is a 10-ish-pound appliance, not a slab of plastic. The bracket-and-slide mounting exists precisely for this — you never hold the weight while fumbling with bolts.
- A brief setup pass. Water temperature, seat temperature, and pressure get set once from the remote or side panel. Five minutes, once.
- Power draw is a non-issue. These plug into a standard 15-amp bathroom circuit alongside your hair dryer without drama.
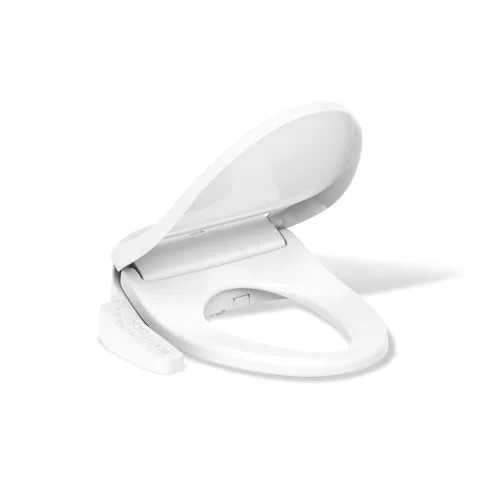
If you're still weighing whether the electric premium is worth it at all, we've laid out the honest math — cost, comfort, and what owners actually say a year in — in are bidet seats worth it?
The five mistakes behind almost every problem
Read the one-star reviews of any bidet seat and the same handful of self-inflicted problems repeats. All five are avoidable in the moment, and all five are fixable after the fact:
- 1. Cross-threading the T-valve. Plastic threads on the fill valve are soft. Forcing a crooked start strips them, and a stripped fill-valve inlet means replacing the fill valve (a $12 part, but an hour you didn't plan). The fix is the reverse-quarter-turn trick from step 3: rotate backwards until the thread clicks into its groove, then tighten. It should spin on easily for several turns before resistance. If it fights you on turn one, it's crooked — back off and restart.
- 2. Overtightening plastic nuts. The instinct that keeps a car's lug nuts on will crack a bidet's plastic fittings. Hairline cracks don't leak immediately — they leak at 2 a.m. three weeks later. Hand-tight, then stop. If it drips, another eighth-turn. The rubber washer does the sealing; the nut just holds it in place.
- 3. Ordering the wrong bowl shape. Covered above, worth repeating: measure before you buy. An elongated seat on a round bowl overhangs; round-on-elongated leaves the front rim exposed. Neither is installable around. The fit guide takes two minutes and saves a return shipment.
- 4. Teflon tape where it doesn't belong. Washer-sealed compression fittings seal on the washer face, not the threads. Tape on those threads holds the washer off its seat and creates the leak. Reserve tape for tapered metal pipe threads only — which a standard bidet install doesn't have.
- 5. Skipping the depressurize step. Unscrewing the supply line with the valve open, or with a full pressurized tank line, turns step 3 into a geyser story. Valve off, flush, hold the handle down. Thirty seconds that keep the bathroom dry.
Troubleshooting: it drips — now what?
First, don't panic and don't reach for the wrench. A drip after install is almost always one of three things, in this order of likelihood:
- A washer that isn't seated. Shut the valve, unscrew the offending fitting, and look inside the nut. The rubber washer should sit flat in its recess. If it's tilted, folded, or missing (check the bag), fix that and re-tighten by hand. This solves the majority of drips outright.
- A fitting that's slightly loose. Snug it another eighth- to quarter-turn by hand and towel-test again. Tighten in small increments — going straight to "very tight" overshoots into mistake #2.
- A cross-threaded connection. If a fitting was hard to turn from the first thread and now weeps no matter what, back it all the way off and inspect the threads for shredding. Restarted straight, it may still seal; visibly chewed plastic threads mean replacing the T-valve (cheap) or fill valve (cheap, more work).
Location tells you a lot: a drip at the tank-to-T joint or T-to-hose joint is a washer/tightness issue at that specific joint. Water tracking down the hose itself and dripping off the low point can originate at either end — dry everything with a towel, then watch with a flashlight to find the true source before adjusting anything.
When you actually need a plumber (almost never)
For the install itself: essentially never. The job has no permanent plumbing modifications — everything threads on and threads off, and the worst realistic mistake costs you a $12 fill valve and an hour. There are exactly three situations where calling a pro is the right move:
- The shut-off valve is frozen or leaking. Old multi-turn valves seize, and forcing one can snap the stem — now you're shutting water off at the main. A plumber swaps in a quarter-turn valve in under 30 minutes, and it's a repair your bathroom needed anyway.
- There's no shut-off valve at all. Rare in US homes, but some older bathrooms plumb the toilet straight from the wall. Adding a valve is quick professional work.
- You want an outlet added — which is an electrician, not a plumber, and it's the one genuinely non-DIY piece of the electric-bidet puzzle for most people. Typical cost for adding a bathroom GFCI receptacle runs a few hundred dollars depending on your market and how far the nearest circuit is.
Everything else — the T-valve, the bracket, the hose, the seat — is squarely in "assembled a bookshelf once" territory. Owner reviews back this up across the category: tens of thousands of verified buyers, and "easier than I expected" is one of the most repeated sentiments in the positive reviews of every product on this page.
Frequently asked questions
How long does a bidet seat installation really take?
Plan for 20–30 minutes on a standard toilet if it's your first time, including reading the manual. Attachment-style bidets run closer to 15–20 minutes because you never remove the existing seat. The only common time-sink is a stubborn old shut-off valve or corroded seat bolts, which can add ten minutes of gentle persuasion.
Do I need to connect a bidet seat to hot water?
No. Electric seats connect only to the toilet's cold supply line and heat water internally — either in a small reservoir or instantly as it flows. Non-electric seats and attachments in the standard configuration are cold-water-only. You never touch your home's hot water plumbing for any product covered in this guide.
Can I install an electric bidet seat without an outlet nearby?
Not properly. Electric seats require a GFCI outlet within reach of their roughly 3.5–4 foot cord, and manufacturers advise against extension cords in a bathroom. Your options are hiring an electrician to add a GFCI receptacle (a few hundred dollars, one time) or choosing a non-electric seat or attachment, which needs no power at all and installs the same way minus the plug.